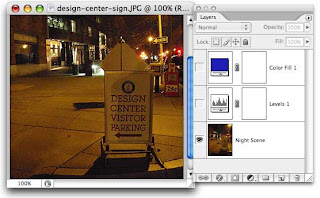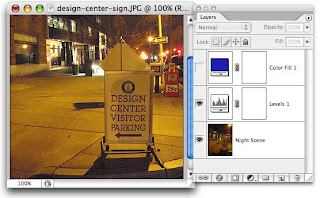
The human eye often plays tricks under different kinds of lighting. Although it looked 'gray' and cool, Trees like the daylight lighting, but obviously digital cameras don't.
But let's see if we can bring this photo back to the way I saw it by using some of Photoshop's tricks. One thing I can do very little about, and that's the grain of the photo. This Olympus automatically raises the ISO / ASA number in darker shots to make the camera more sensitive to subtle light and to shorten the exposure time. It was probably not a good idea. This looks like Ecktachrome film pushed to about 1200 ASA. Lots of grain I can do nothing about.

The shot is obviously dark. Perhaps it was this dark, but for the sake of the photo I'll want to lighten it up. For this I add a Levels Adjustment Layer. (Open the Levels dialog now.)
I moved the White point slider (far right) to the left just slightly. This brightens the overall image. In order to bring out more detail in the shadow areas, and raise the mid-tones, I'll also move the "Mid-Tones" slider (middle) very slightly to the left. Now, the shot seems more realistic and balanced light wise.
But the color is tragically off. The lights have made it way too yellow. Those sidewalks were gray, event hough bathed in yellowish light. Whites and lighter colors were decidedly blue or blue-gray. You might be tempted to use a color adjustment layer, or start futzing with curves. But this night scene was affected by two overall forces: first it was dark. Secondly, the entire scene was covered in artificial light attempting to simulate daylight. So rather than taking a long, tedious ordeal of adjusting specific color ranges, I felt an overall cooling effect was needed.

I first tried a Photo Filter layer. But the "cool" settings did little to overcome the extreme color shift. I would need something stronger, so I selected Layer > New Fill Layer > Solid Color. As above, you can see I selected a darker, ultramarine blue. But also note I set the Layer Blending mode to "HUE" and then moved the Opacity slider until the scene looked right. (Around 35%.)
Remember -- keep it simple! I saved a lot of time playing with color balances by recognizing the nature of the shot -- and what overall forces were causing the problems.

