Create From Scratch in Photoshop
you can create the artwork in Adobe Illustrator and then imitate a hand drawing effect in Photoshop.
First draw a vector illustration. Then import it in Photoshop. Use a grungy brush and gently erase select parts of the image. Use the Blur tool to create the smug effect.
Scan Now
The easiest way — scan the drawing and set the layer blending mode to Multiply.
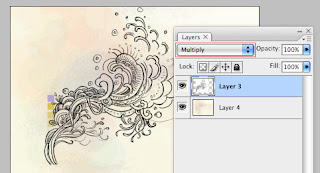
Invert Color
If you want to have a white color stroke instead of black — go to menu Image > Adjustments > Invert (or press shortcut Cmd+i) and then select Screen blending mode.
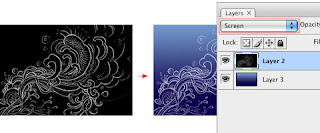

Create Color Gradients
What if you want more than just a black or white stroke (ie. colors gradients)? Then you will have to extract the drawing from the white background. A simple way to do this is by using alpha channel.
Copy (CTRL+C) the drawing.
In the Channels palette, create a new channel. Then paste the drawing in the new channel.
Invert (CTRL+i) the channel layer.
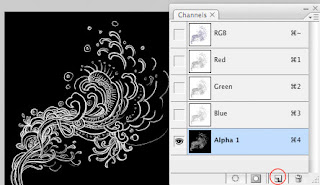
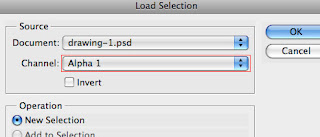
Go back to the Layers palette, create a new layer. Go to menu Select > Load Selection. In the Load Selection prompt box, select Channel: "Alpha 1" (which is the name of the alpha channel I created earlier).
Fill Selection
With the channel selection loaded, you can fill it with any color.
Using in Design
I’m going to show you how to incorporate your hand drawing on a female model.

1. First, cut out the model
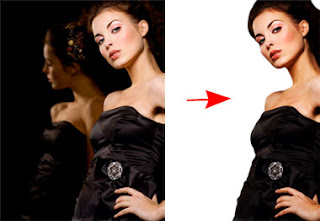
2. Fill the background with some sort of light glowing gradients.

3. Paste the drawing on top of the model. Lock the layer transparency. Play around with the color gradients.

4. Duplicate the drawing in the background to add more details to the image.


