Step 1:
First step is to make the document in Photoshop. File > New, use a size of 468 x 60 pixels.
Now fill the background with a nice orange gradient, the colors I used for my gradient were #e14d0f and #4d1805.
 Note that you’ll need to use the Gradient Tool to fill the background with the gradient. You can find the gradient tool on the same button as the fill bucket tool.
Step 2:
Next thing to do is create a new layer. Now using the Polygonal Lasso Tool, make a selection like mine in the left section of your document.
 Be sure you’re on a new layer, then fill your selection with a nice, bright gradient, the colors for the gradient I used were #0084e6 and #003967.
 Right-click your layer and go into the Blending Options, apply the following layer styles for your blue gradient layer:
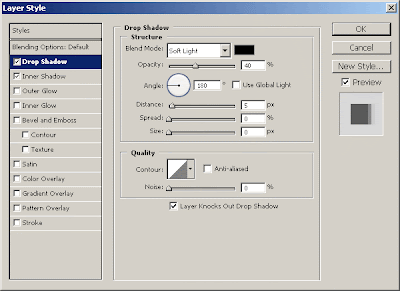
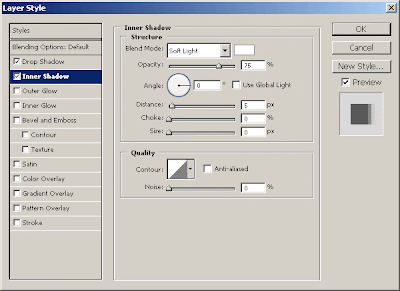 After you applied those two layer styles, your thing should now look like this:
 Lastly for this step, add a nice glossy highlight to your blue gradient layer, you can do this by following these few simple steps:
1. Start by making a new layer, now select the blue gradient layer by holding ctrl and clicking the layer’s thumbnail.
2. Using the Gradient Tool, drag a white gradient inside of your selection.
3. After making your gradient, nudge your selection down 30 pixels (hold shift and press the down arrow key three times) then press delete.
4. Change the layer mode for your shine layer to Soft Light, and lower the opacity to about 30-55%.
 Step 3:
How about adding some nice details?
Start by using the pen tool to make a nice, smooth path in the background on the right. After you made a nice selection, do a little soft brushing inside then change the layer mode to Soft Light and lower the opacity if needed.

 Step 4:
Write out your description text in the left section using the Horizontal Type Tool, write your text out in white (#FFFFFF.)

The font used above is called RockWell, you can find it for free on DaFont.
After writing out your text, apply the following layer styles:

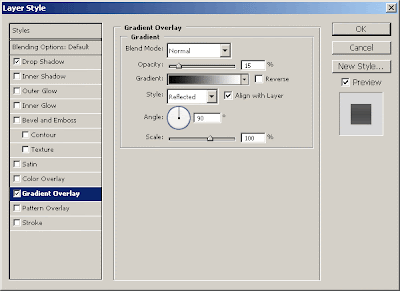 That will have made your text stand out a bit more nicely.
 Step 5:
Next thing to do is add in some thumbnails or something else on the right side, or you could use some descriptive text. I added in 3 thumbnails from tutorials from PhotoshopSpot, then applied this Inner Glow and this Stroke.
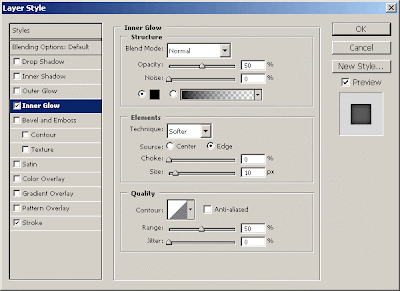
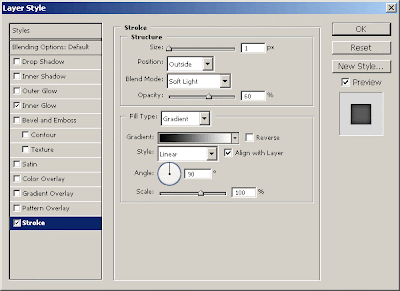 You should have something like this:
 Step 6:
Lastly you’ll want to add in something that will attract the users’ eye, so I added in a little star badge with the text: “GO!”
 Firstly I made the star badge by using the Polygon Tool, then I added in the following layer styles:
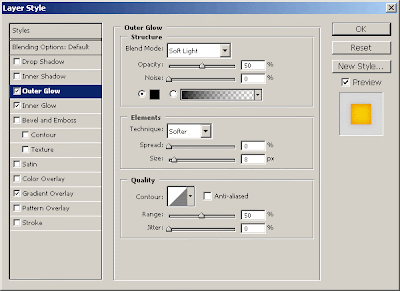
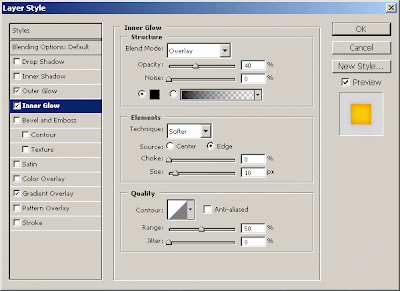
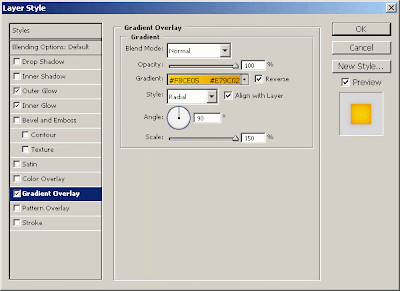 And you should have a badge that looks like this:
 Lastly I added in the text for the badge, I then applied the following layer styles:
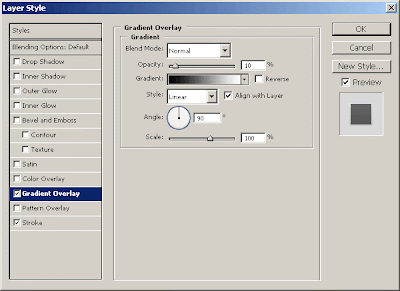
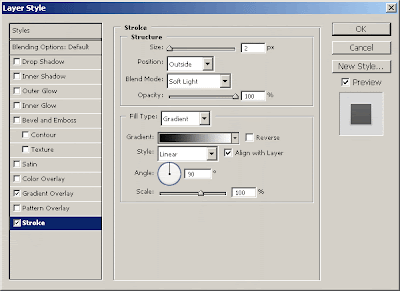 And now you should have text that looks like this:
 Step 7:
Last thing you will want to do is add in the border, I guess it depends what sort of website it will be going on to choose the color. If it’s going on a black website, you should use white as the border, if it’s going on a white website, you should use a black border.


